How To Set Up Alexa on Your Netgear WiFi Extender?
Are you facing issues with your Alexa device? If yes, then configuring it with the Netgear WiFi extender is one of the best options to consider. But, first and foremost, you have to set up Netgear WiFi extender. And, once you are done with setting it up, we will shed light on the query saying How to set up Alexa on your Netgear WiFi extender. Let’s get started!
Set up Netgear WiFi Extender using two Easy Methods
There are two easy methods through which setting up Netgear WiFi extender will become a walk in the park for you.
- First method is using the manual method
- And, second method is using the WPS method
Now, we are going to provide instructions to set up Netgear WiFi extender using both the methods.
Netgear WiFi Extender using Manual Method
Given below are the instructions that will help you set up the Netgear WiFi extender in a matter of minutes:
Step 1: First things first, choose a working power socket for your WiFi range extender near to your router. Upon finding the wall socket, plug in the extender and wait till the power LED on it gets stable.
Step 2: Thereafter, take an Ethernet cable (recommended CAT6) and insert its one end in the Ethernet port of your router and other end of the cable in your Netgear WiFi extender.
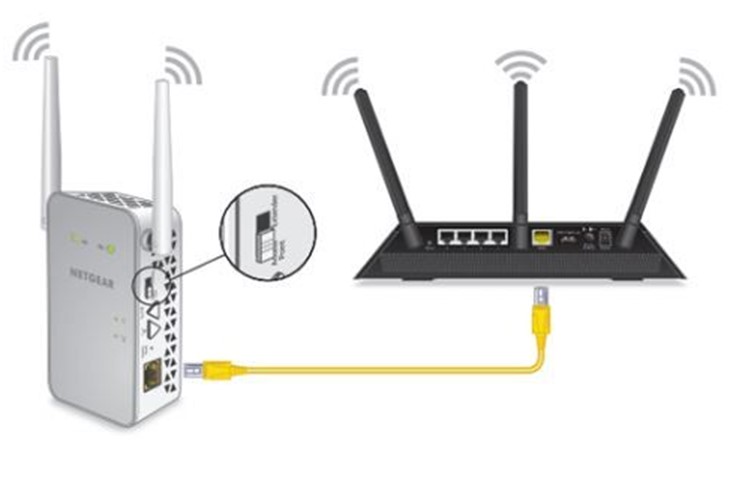
Step 3: Upon establishing a finger-tight Ethernet connection between your host router and Netgear WiFi extender, power on your computer or laptop. Once you have opened it, connect it to the Netgear device using an Ethernet cable. Or, if you don’t have extra Ethernet cable for connecting your client device and the extender, connect them wirelessly.
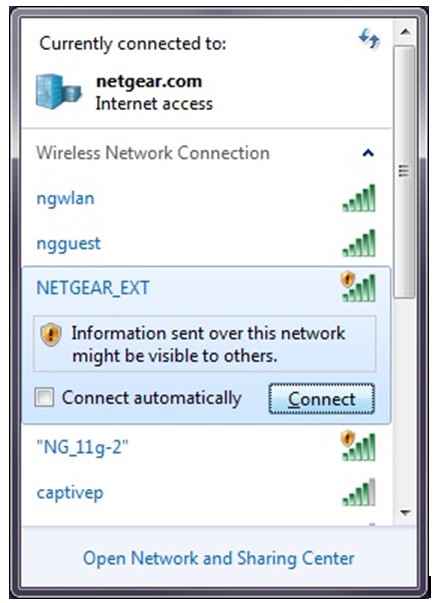
To connect the devices wirelessly, open your PC/ laptop, and navigate to the WiFi settings. Upon clicking on the WiFi icon, you will see a list of networks displayed in front of you. From the appearing list, select your extender’s default SSID, Netgear_ext, and get connected using the correct WiFi password.
Step 4: Open a web browser of your choice. In the address bar, type mywifiext.net and press the Enter key. Ensure to type the correct web address and cross-check the entree.
Step 5: Upon typing the extender’s default web address correctly in the address bar, when you hit the enter key, you will see yourself landed on the Netgear extender login page.
Step 6: Provide the default extender’s login credentials and click Log In.
You are all Done!
Netgear Genie setup wizard will display. Now, as per your extender’s model you have, follow the on-screen instructions and set up Netgear WiFi extender like a pro.
In this way, you can set up your Netgear WiFi extender using the manual method. If you don’t want to go with this method or this method seems difficult to you, then go ahead and try to WPS method for setting up the device.
Netgear WiFi Extender using WPS Method
Given below are the instructions that will help you set up the Netgear WiFi extender in blink of an eye:
- Step 1: Place your Netgear WiFi extender and router at a safe distance (closer).
- Step 2: Once you are done, locate and press the WPS button on your Netgear WiFi extender.
- Step 3: Within a minute, locate and press the WPS button on your WiFi router.
That’s it! You are successfully done with setting up Netgear WiFi extender using the WPS method. Now, you can set up/ connect your Alexa with the device in discussion i.e. Netgear extender.
On the off chance, you existing router is not WPS-capable, you can opt for Xfinity router (suggestion). If you consider our suggestion, know how to connect Netgear extender to Xfinity router with ease.
How To Set Up Alexa on Your Netgear WiFi Extender?
- First things first, download and install the Alexa app and the Netgear app.
- Thereafter, launch the Alexa app from a mobile device that is connected to SSID (WiFi network name) of your Netgear extender.
- As soon as you are logged in to the Alexa app, tap on More > Settings > Device Settings.
- Scroll up or down a little and select Alexa/ Echo Dot.
- Under STATUS, you will see Wi-Fi Network option. Yes? Tap on it!
- Tap Change now.
The Ball is in Your Court!
- Now, on your Echo Dot/ Alexa, push and hold the Action button. How long do I have to hold it? Well, you have to hold it till the light turns orange/ amber.
- Tap Continue and as soon as the light turns orange, tap Yes.
The device is ready to set up now.
- Now, you need to move to the WiFi settings on your mobile phone and choose a network name (SSID) like Alexa-xxx.
- Once you are done, get back to the Alexa app and let it detect available WiFi networks active nearby.
- Select the NetgearWiFi extender’s SSID, Netgear_ext from the list and input the WiFi password.
- Let the Alexa/ Dot make the connection.
- Once the connection is successfully made, tap Continue.
And, there you are! You are successfully done making the WiFi connection.
This is how To set up Alexa on your Netgear WiFi extender. Now, your Alexa is ready to take commands, play music, set reminders, play jokes, open doors, turn on/ off lights, and do much more on it.
The Last Words
With the hope of helping you, we are going to wrap our blog post on How To Set Up Alexa on Your Netgear WiFi Extender. Anticipating that you find the information provided here useful and helpful.