Step-by-Step Setup: Login & Configure with Ap.setup & 192.168.10.1
If it is your first time to set up a WiFi extender, it might feel hard. But it’s very easy if you follow the right steps. A lot of repeaters have web setup page: ap.setup or 192.168.10.1. All you have to do is to finish setting it up and connect it to your home WiFi and save the changes.
Let’s use clear, simple words to go through each setup & login step.
What You Need Before You Start
Before beginning, make sure you have:
- A working WiFi repeater
- A phone, tablet, or laptop with WiFi
- Your home WiFi name and password
- A browser like Chrome, Safari, or Firefox
Now you’re ready to go.
Step-by-Step Setup Guide
Step 1: Plug in WiFi Repeater
- Find a wall socket close to your router.
- Plug in the WiFi repeater and wait until its power light turns solid (green or blue).
- This usually takes about 1-2 minutes.
Step 2: Connect to the Repeater’s Network
- Go to the WiFi settings on your device.
- Look for a network like Repeater Setup, Wireless-N, or the name of the repeater brand.
- Tap to connect. No password is usually needed at this stage
Step 3: Open the Setup Page
- Open a browser on your phone or computer.
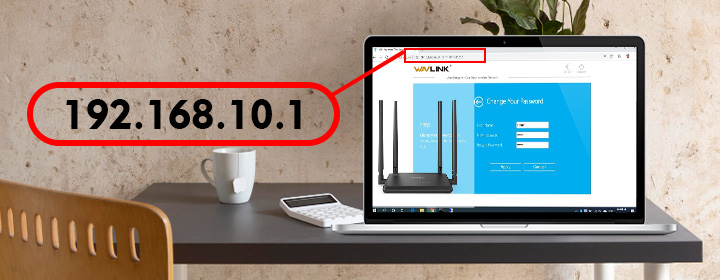
- In the address bar at the top (not the search bar), type, ap.setup or 192.168.10.1, and press Enter or Go.
- You should now see the login screen of your repeater.
- Use the default username
Step 4: Enter Login Details
e and password. These are often: Username: admin Password: admin or leave it blank
- You can find the default credentials on a sticker on the repeater or in its manual.
Step 5: Select Repeater Mode
- After logging in, choose the option that says Repeater Mode or Range Extender.
- The repeater will then scan for available WiFi networks nearby.
Step 6: Choose Your Home WiFi
- From the list, select your home WiFi.
- Enter your WiFi password exactly as you would on any other device.
- Some repeaters let you rename the new network. You can add _EXT to the name if you want.
Step 7: Save and Restart
Click on Apply, Finish, or Save.
- The repeater will reboot. This may take around 1 minute.
- Wait until the LED light becomes solid again.
- Once done, your repeater is ready.
Step 8: Connect to the Extended Network
- On your phone or laptop, go to WiFi settings again.
- Now you’ll see the new extended network name.
- Tap to connect and enter your regular WiFi password if needed.
How to Access Settings Again
If you need to change settings later, just follow these steps:
- Connect to the repeater’s WiFi. And open a browser.
- Type 192.168.10.1 or ap.setup in the address bar.
- Enter your admin username and password.
- Change what you need and click Save.
Forgot the Login Info?
- Press and hold the Reset button on the repeater for 10 seconds using a paperclip.
- The lights will blink and return to default.
- You can now start the setup again from Step 1.
Common Setup Issues & Fixes
Problem 1: ap.setup or 192.168.10.1 doesn’t load
- Make sure you are connected to the repeater’s WiFi.
- Try typing the IP address directly.
- Restart your browser or use another device.
Problem 2: Wrong username or password
- Use admin for both fields.
- Check the sticker or manual if that doesn’t work.
- If all fails, reset the repeater and try again.
Problem 3: No internet after setup
- Recheck your WiFi password.
- Make sure the repeater is not too far from the router.
- Try moving it closer and repeat the setup.
- 192.168.10.1 vs. 192.168.1.1 Login
People often confuse these two:
- Most repeaters use 192.168.10.1 WiFi repeater login.
- Most routers use 192.168.1.1 login.
If one fails, depending on your device, try the other.
Final Words
Using ap.setup or 192.168.10.1 to configure a repeater calls no technical expertise. Simply follow each step and you will soon expand your WiFi coverage. Whether you use it at home or at work, the correct configuration significantly affects your internet speed and stability.